Tutorial: Real-Time WebRTC Hardware Encoding and Streaming with the Osprey Talon and Dolby.io
Story Highlights
In this guide, we’ll be demonstrating how you can connect and deliver a 1080p H.264 WebRTC stream with an Osprey Talon 4k-SC encoder using Dolby.io Streaming.

Setting up an Osprey Encoder to stream WebRTC
To natively encode WebRTC and stream it, you will need three things:
- A Dolby.io account
- A camera + HDMI or SDI connection and cable
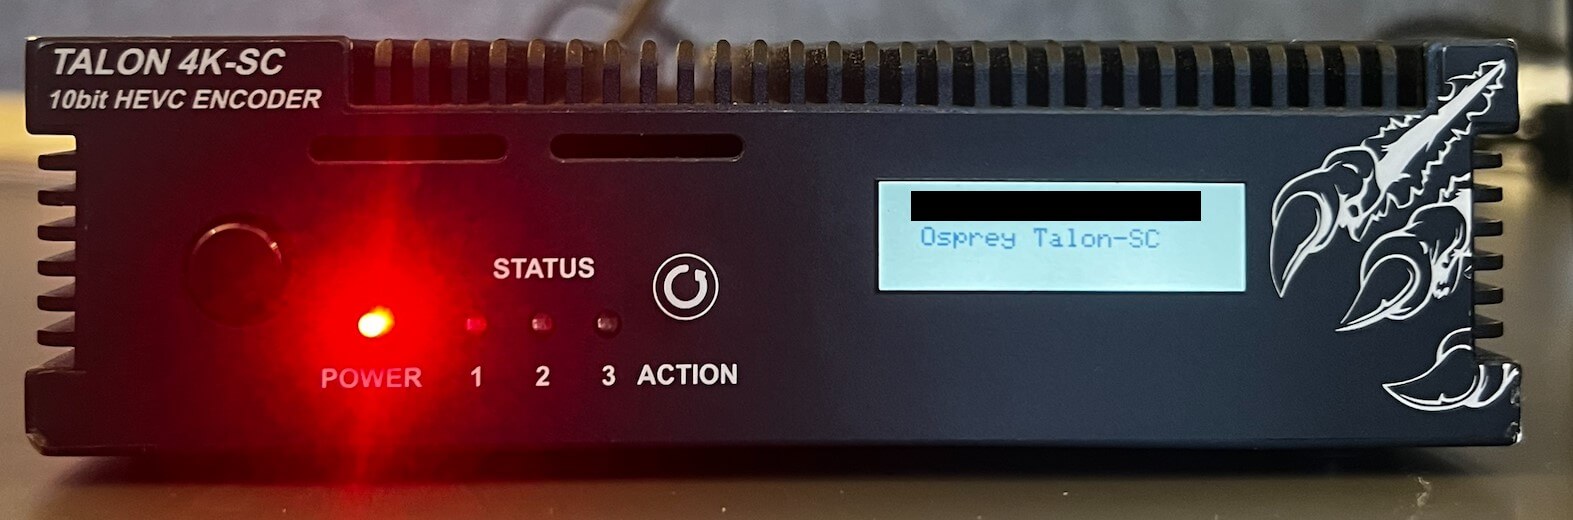
- An Osprey Talon Encoder + Ethernet connection
To get started we first must set up the camera and the encoder. The camera can be connected to the encoder via an HDMI or SDI cable and the encoder can be connected to your local network via an ethernet cord. Next, you can power on the encoder by connecting the power cord and pressing the power button on the front of the device.
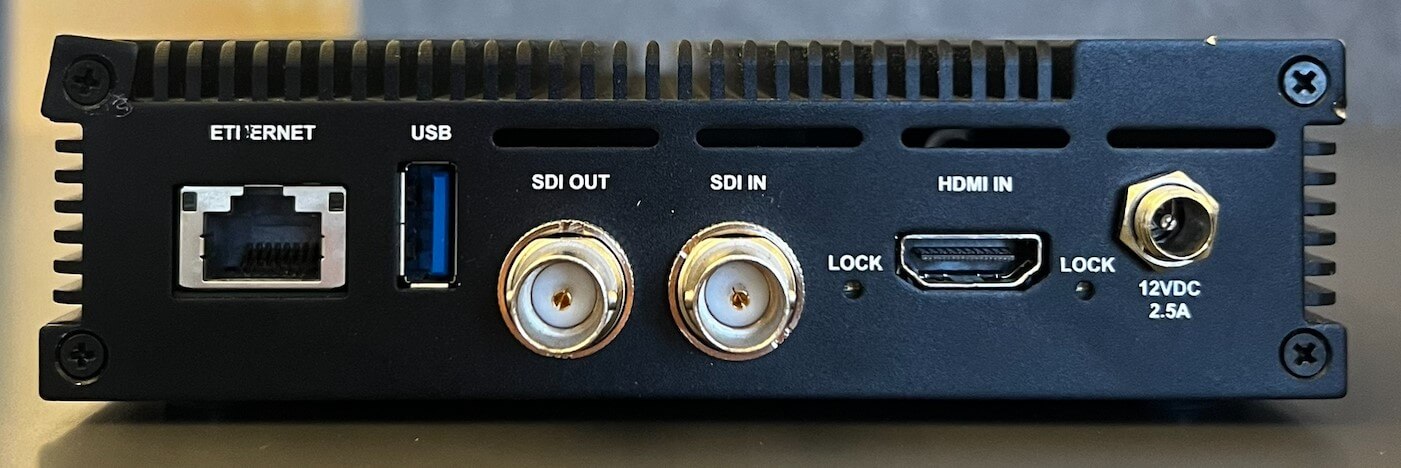
With the device powered and connected, it is now discoverable on your local network. You can connect to it using a computer after downloading and running the Talon Boss interface.
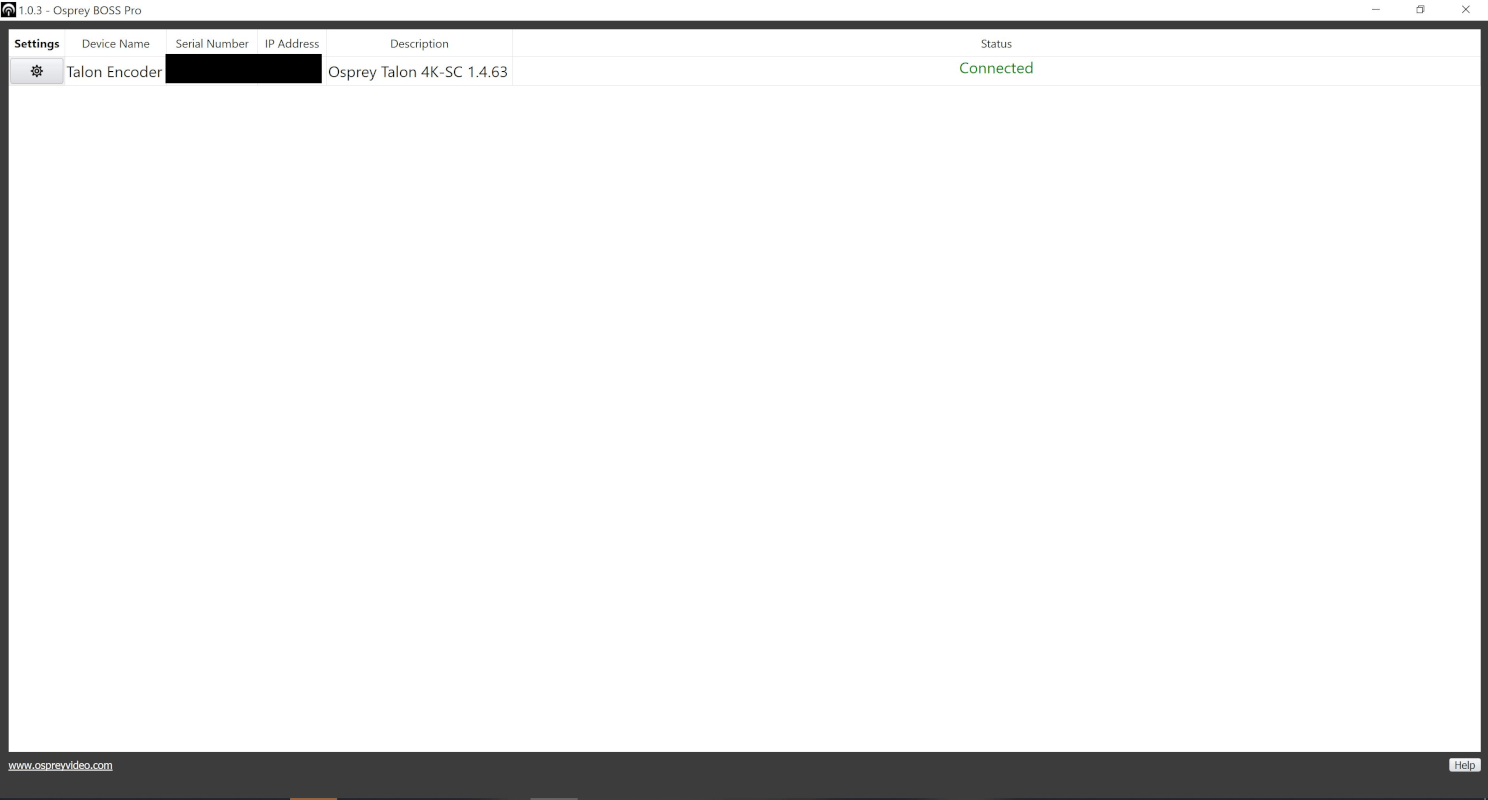
Click on your device and launch the Osprey Web Interface. To log in you will use the default credentials Username: admin and Password: osprey, which can be changed once you log in. If your device isn’t appearing on the Talon BOSS interface, refer to the Talon Pro Encoder Manual for a list of common issues and fixes.
From here, the web interface will open, and we can begin configuring our encoder.
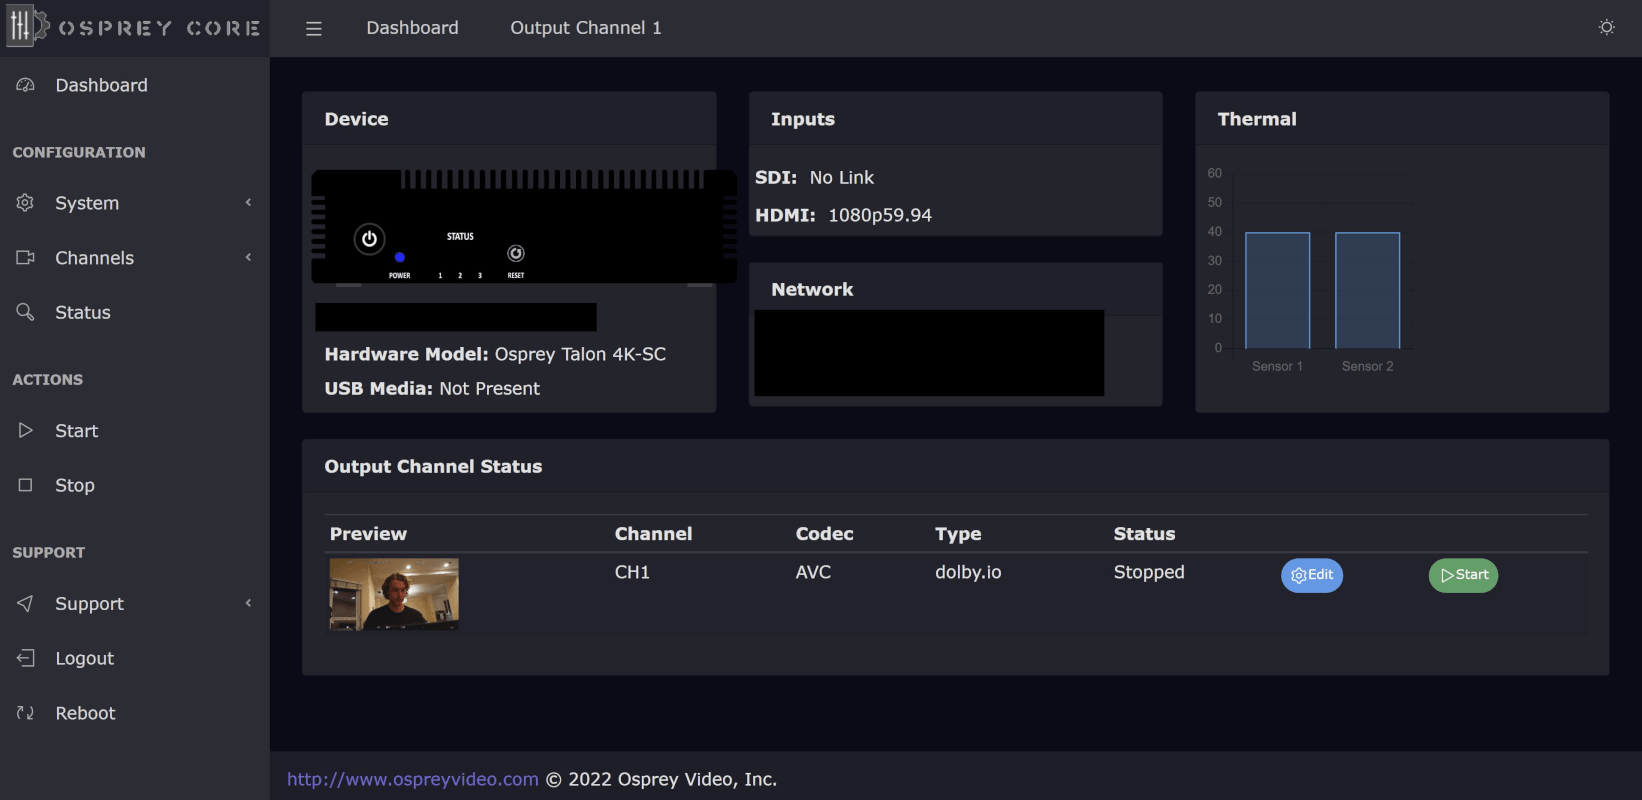
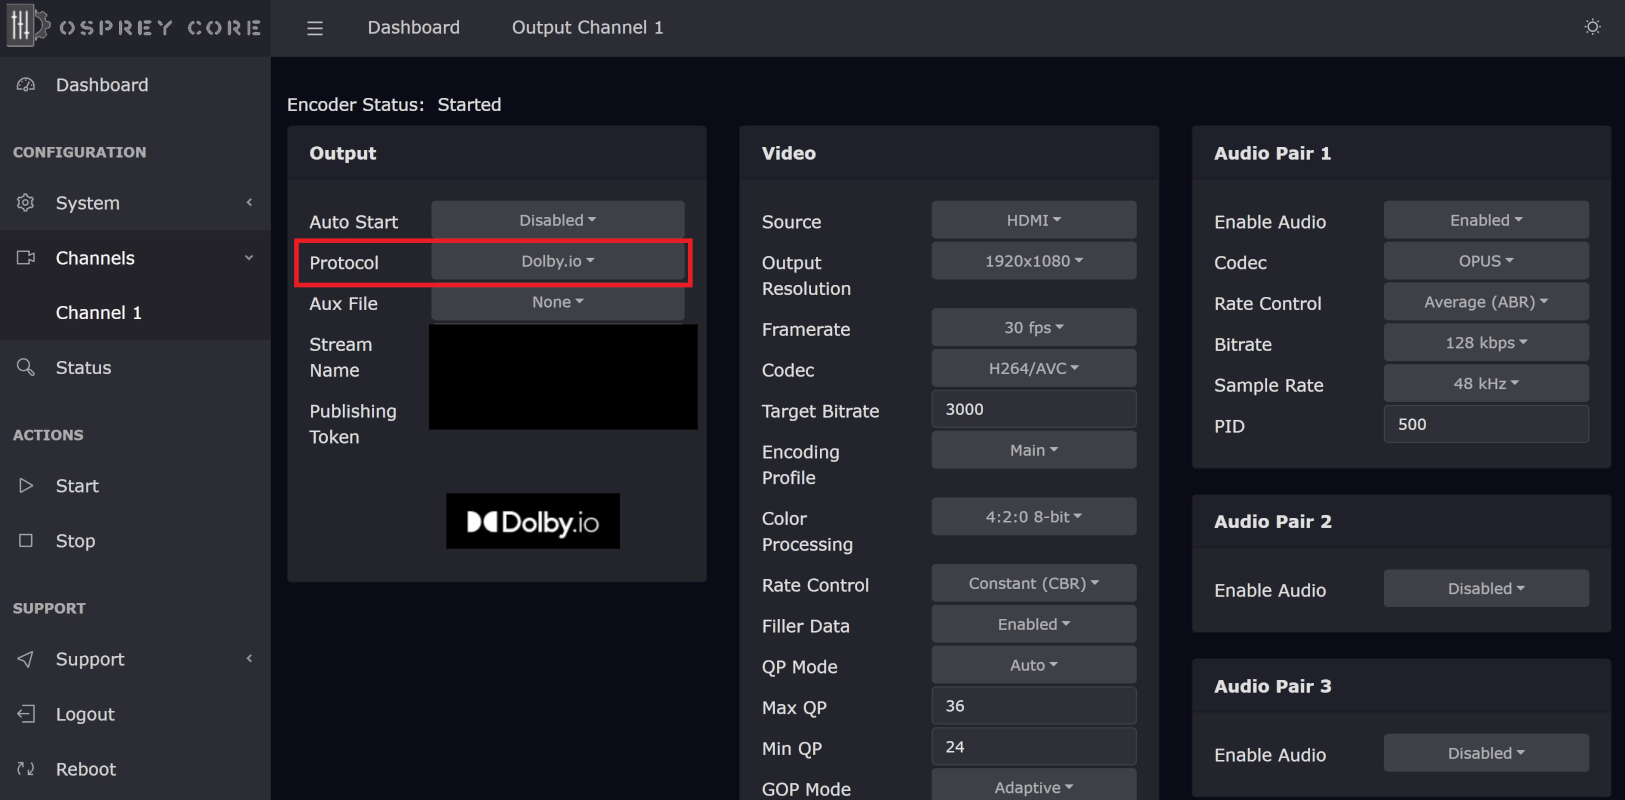
To configure the encoder, we must first click on Channels then Channel 1. From here need to specify the protocol, in this case, WebRTC, which we can do by setting the Protocol to Dolby.io. With the protocol defined, we can switch over to our Dolby.io dashboard to find our Stream Name and Publishing Token.
If you haven’t already created a free Dolby.io account, now is a great time to do so. From your Dolby.io dashboard switch over to Streaming and create a token by clicking the purple plus icon in the top right corner.
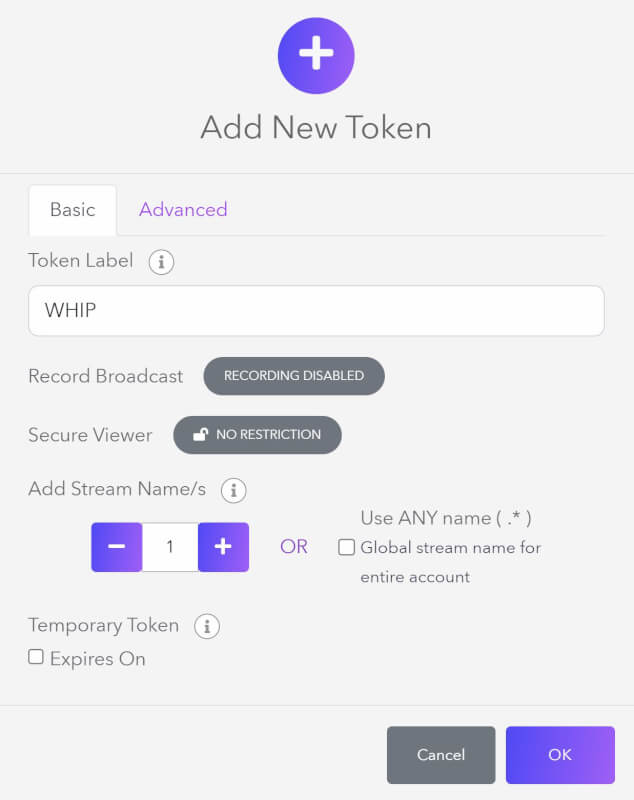
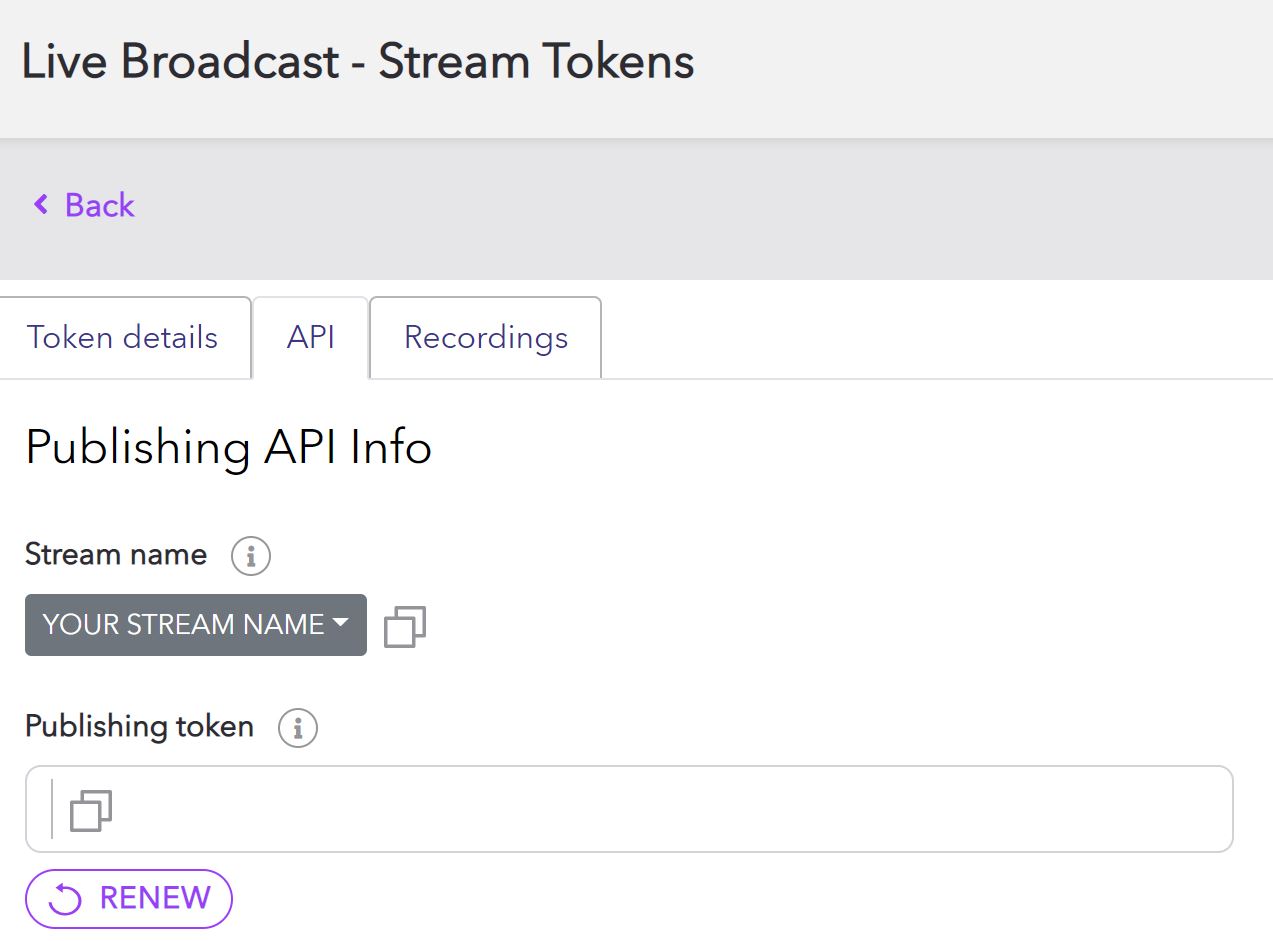
In this case, we can leave the settings set to default, however, there are a number of different options you can alter for securing tokens, recording, and even specifying which Dolby.io Streaming cluster region to use. To learn more check out the documentation or this guide on securing Streaming tokens. Otherwise, we can click Ok and create the token. Click on the Manage Token button, select the API tab, and copy our Stream Name and Publishing Token.
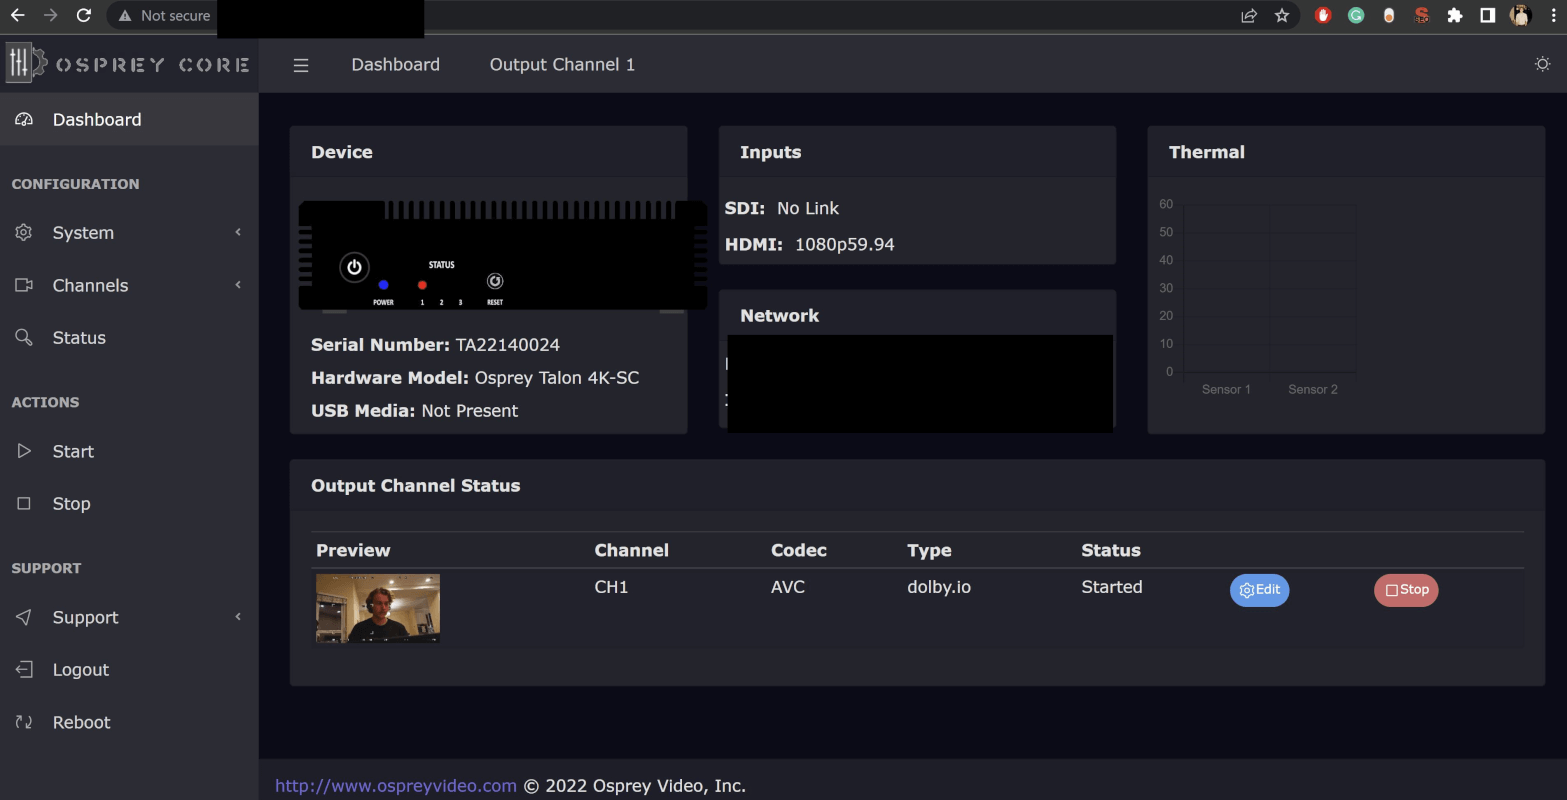
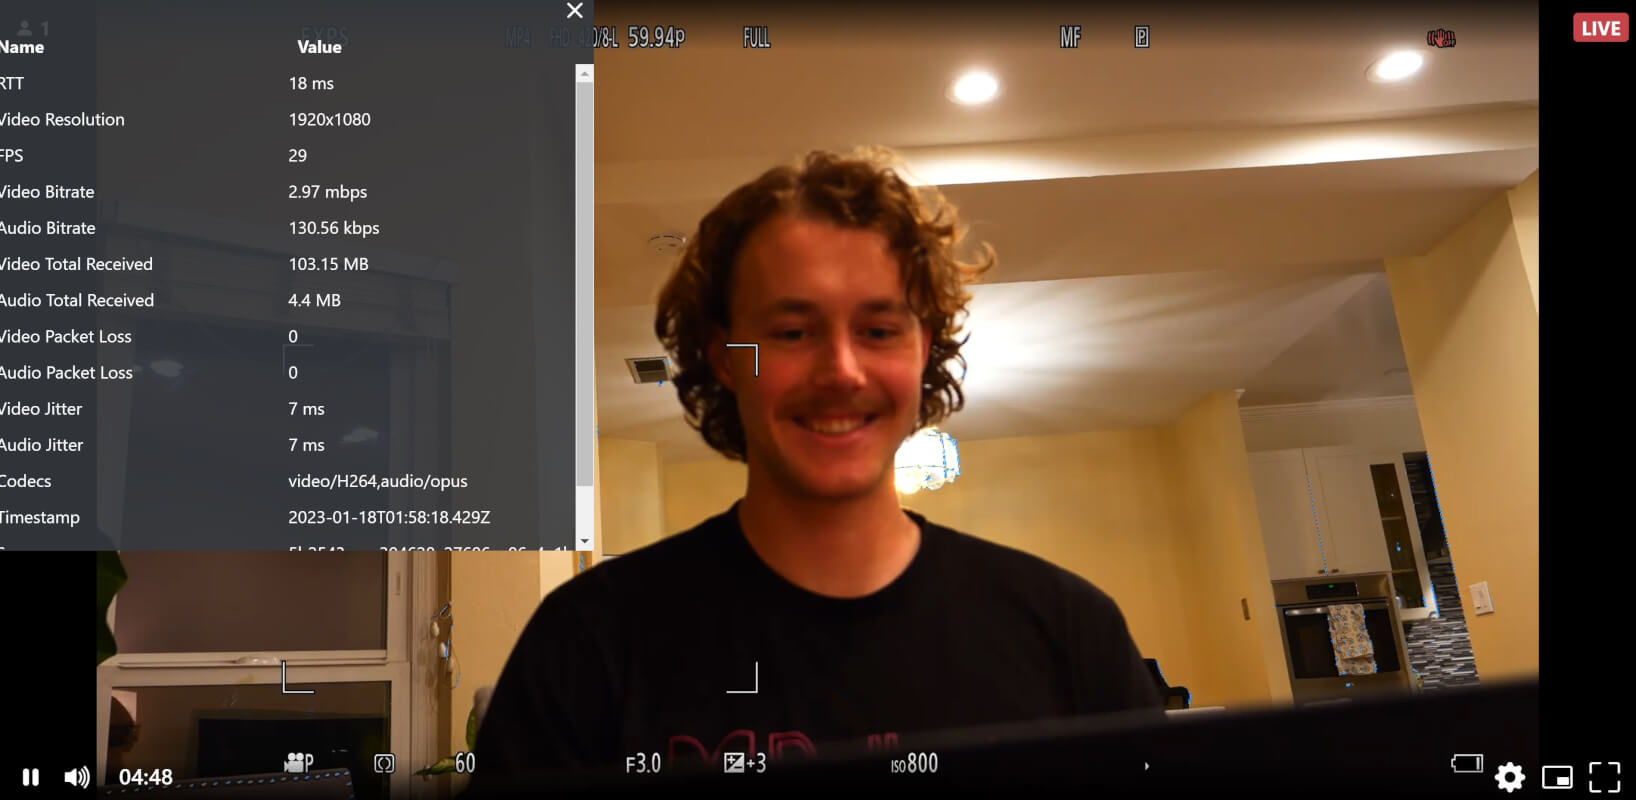
We can paste these credentials in the corresponding sections and switch back to the main dashboard where we should see the Output Channel Status and the option to start the stream. Once started, the stream will load a preview picture and begin streaming out to the viewer.
The hosted streaming player can be found by formatting a URL with your Dolby.io streaming credentials as below:
In addition to using the viewer, you can also ingest the content into OBS for remote live production or create your own live stream viewer app.
WebRTC Encoders are a Perfect Match
By natively encoding WebRTC the Osprey Talon ensures that quality and speed are prioritized allowing the streams to be used for all kinds of solutions such as remote live production, sportscasting, and even live auctions. In addition to WebRTC, the encoder can also be used for a number of other streaming protocols that Dolby.io supports including Secure Reliable Transport or SRT streaming and Real-Time Messaging Protocol or RTMP streaming.